Download Software Free
Archive for June 7, 2024

Pro tools software download | Free Download + Crack
06 months
by sammas.org
in Uncategorized
Pro tools software download is the industry standard for professional audio production, and for good reason. With its powerful features and user-friendly interface, it’s no wonder that top recording studios and audio engineers around the world rely on it to create high-quality audio content. But what exactly is Pro Tools, and how do you get started with it? In this comprehensive guide, we’ll walk you through the process of downloading and using Pro Tools software, covering its benefits, features, and system requirements along the way.”

Benefits of Using Pro Tools
Pro Tools is widely regarded as the industry standard for professional audio production, offering a range of benefits that make it an essential tool for audio engineers and producers. Some of the key benefits include:
- Industry-standard compatibility: Pro Tools is widely used in the audio industry, making it easy to collaborate with other professionals and ensure compatibility with various audio formats.
- Advanced editing capabilities: Pro Tools offers advanced editing features, such as multi-track editing and automation, that allow for precise control over audio content.
- High-quality audio processing: Pro Tools includes a range of high-quality audio processing tools, including EQ, compression, and reverb, that help to enhance and refine audio tracks.
- Integration with other software: Pro Tools integrates seamlessly with other software and hardware, allowing for easy integration into existing workflows.
Features of Pro tools software download
Pro Tools offers a range of features that make it an ideal choice for professional audio production. Some of the key features include:
- Multi-track editing: Pro Tools allows for multi-track editing, enabling users to work with multiple audio tracks simultaneously.
- Automation: Pro Tools includes automation features that allow users to control audio levels and other parameters over time.
- Plug-ins: Pro Tools includes a range of plug-ins that provide additional audio processing capabilities, such as EQ, compression, and reverb.
- Integration with other software: Pro Tools integrates seamlessly with other software and hardware, allowing for easy integration into existing workflows.

System Requirements for Pro tools software download
To run Pro Tools effectively, you’ll need a computer that meets the following system requirements:
- Operating System: Pro Tools is compatible with both Windows and macOS.
- Processor: A multi-core processor is recommended for optimal performance.
- Memory: A minimum of 8 GB of RAM is recommended, but 16 GB or more is ideal.
- Storage: A fast storage drive is recommended, such as an SSD.
- Audio Interface: A high-quality audio interface is required for optimal audio performance.
Downloading and Installing Pro tools software download
To download and install Pro Tools, follow these steps:
- Purchase or subscribe to Pro Tools: You can purchase Pro Tools outright or subscribe to it through Avid’s subscription service.
- Download the software: Once you’ve purchased or subscribed to Pro Tools, you can download the software from the Avid website.
- Install the software: Follow the installation instructions to install Pro Tools on your computer.
- Activate the software: Once installed, you’ll need to activate the software using your license key.
- Set up your audio interface: Connect your audio interface to your computer and set it up according to the manufacturer’s instructions.
- Start creating: With Pro Tools installed and set up, you’re ready to start creating high-quality audio content.

Conclusion:
In conclusion, Pro Tools is a powerful and versatile digital audio workstation that offers a range of benefits and features for professional audio production. By understanding the benefits, features, and system requirements of Pro Tools, you can ensure that you’re using the software to its full potential. Whether you’re a seasoned audio engineer or just starting out, Pro Tools is an essential tool for creating high-quality audio content.
FAQS
What is the best version of Pro Tools for beginners?
Pro Tools First is the best option for beginners as it’s free and offers essential features to get started.
Can I use Pro Tools on a laptop?
Yes, as long as your laptop meets the minimum system requirements, you can run Pro Tools efficiently.
How do I get Pro Tools for free?
Pro Tools First is a free version available for download on the Avid website.
What are the best plugins for Pro Tools?
Some top plugins include Waves SSL G-Master Buss Compressor, FabFilter Pro-Q 3, and iZotope Ozone.
Is Pro Tools worth the investment?
Absolutely! Pro Tools is a robust, professional-grade DAW that offers unparalleled features and industry recognition.

Os x yosemite software download 10.10.5 | For MacOS
06 months
by sammas.org
in Uncategorized
Introduction
Hey there, Mac enthusiasts! Are you curious about OS X Yosemite and how to get it on your Mac? You’ve come to the right place. In this blog post, we’ll dive into everything you need to know about OS X Yosemite, from its features and benefits to a step-by-step guide on downloading and installing it. By the end of this article, you’ll be ready to enjoy all that Yosemite has to offer. Let’s get started!
What is OS X Yosemite?
OS X Yosemite, released by Apple in October 2014, is the eleventh major release of the OS X line of operating systems for Mac computers. It brought a fresh look and a range of new features that improved both functionality and aesthetics. Inspired by iOS, Yosemite introduced a flatter, more modern user interface, enhancing the overall user experience.

Why Download OS X Yosemite?
You might be wondering, why should you bother downloading OS X Yosemite? Well, there are several compelling reasons. First, Yosemite is known for its seamless integration with other Apple devices, thanks to features like Handoff and Continuity. These features allow you to start a task on one device and continue it on another, making your workflow more efficient. Additionally, Yosemite supports a wide range of older Mac models, giving new life to your aging machine without the need for an expensive upgrade.
System Requirements for OS X Yosemite
Before you get too excited, let’s make sure your Mac can handle OS X Yosemite. Here are the hardware and software requirements:
Hardware Requirements:
iMac (Mid 2007 or newer)
MacBook (Late 2008 Aluminum, or Early 2009 or newer)
MacBook Pro (Mid/Late 2007 or newer)
MacBook Air (Late 2008 or newer)
Mac mini (Early 2009 or newer)
Mac Pro (Early 2008 or newer)
Xserve (Early 2009)
Software Requirements:
OS X 10.6.8 or later
At least 2 GB of memory
8 GB of available storage
Preparing Your Mac for OS X Yosemite
Preparation is key! Here’s how to get your Mac ready for OS X Yosemite:
Backup Your Data: Use Time Machine or your preferred backup method to ensure your data is safe.
Check Compatibility: Verify that your Mac model is supported (see the list above).
Free Up Space: Make sure you have at least 8 GB of free storage.
How to Download OS X Yosemite
Now, let’s get to the main event: downloading OS X Yosemite. Follow these steps for a smooth download process:
Visit the Official Apple Support Page: Go to Apple’s support page where they provide links to download older versions of OS X.
Sign In with Your Apple ID: You’ll need to sign in to access the download.
Download the Installer: Click the download link for OS X Yosemite, and the installer will begin downloading.

Installing OS X Yosemite
Once you’ve downloaded the installer, here’s how to install OS X Yosemite:
Open the Installer: Locate the downloaded file (usually in the Applications folder) and open it.
Follow the On-Screen Instructions: The installer will guide you through the installation process.
Restart Your Mac: After installation, your Mac will restart to complete the process.
Post-Installation Setup
After installing OS X Yosemite, you’ll need to set things up:
Initial Setup: Follow the on-screen prompts to set up your preferences, such as language and time zone.
Personalization: Customize your desktop, dock, and system settings to suit your preferences.
Exploring New Features in OS X Yosemite
OS X Yosemite introduced several exciting features:
Updated User Interface: A cleaner, flatter design that makes navigation intuitive.
Handoff and Continuity: Start tasks on your iPhone or iPad and continue them on your Mac.
Improved Spotlight Search: Enhanced search capabilities that include web results, maps, and more.
Enhancing Productivity with OS X Yosemite
Maximize your productivity with these tips:
Use Handoff and Continuity: Seamlessly switch between your devices without losing your place.
Keyboard Shortcuts: Learn and use shortcuts to save time (e.g., Command + Space for Spotlight).

Troubleshooting Common Problems
While OS X Yosemite is generally stable, you might encounter some issues. Here are solutions to common problems:
Slow Performance: Try clearing cache and freeing up disk space.
Wi-Fi Issues: Reset your Wi-Fi settings or update your router firmware.
App Compatibility: Ensure your apps are updated to the latest versions compatible with Yosemite.
Keeping OS X Yosemite Updated
Staying up-to-date is crucial for security and performance. Here’s how to keep OS X Yosemite updated:
Automatic Updates: Enable automatic updates in System Preferences.
Manual Updates: Regularly check for updates in the App Store.
Comparing OS X Yosemite with Other Versions
How does OS X Yosemite stack up against other versions? Let’s compare:
Yosemite vs Mavericks: Yosemite introduced a new design and features like Handoff, making it a more integrated experience.
Yosemite vs El Capitan: El Capitan focused on performance improvements and refinements to features introduced in Yosemite.
User Reviews and Feedback
Here’s what users are saying about OS X Yosemite:
Positive Feedback: Users love the new design and integration features.
Criticisms: Some users report performance issues on older Mac models.

Conclusion
OS X Yosemite is a significant upgrade that brings a fresh look and powerful new features to your Mac. Whether you’re looking to breathe new life into an older machine or take advantage of improved productivity tools, Yosemite is a solid choice. So, go ahead and give it a try!
FAQs
Can I upgrade directly to OS X Yosemite from an older version?
Yes, as long as your Mac meets the system requirements and is running at least OS X 10.6.8.
Is OS X Yosemite still supported by Apple?
While Apple no longer provides updates for Yosemite, it can still be used on compatible Mac models.
Will installing OS X Yosemite erase my data?
No, but it’s always a good idea to back up your data before upgrading.
Can I downgrade from Yosemite if I don’t like it?
Yes, but you’ll need a backup of your previous OS or installation media.
Is OS X Yosemite free to download?
Yes, OS X Yosemite is available for free from the official Apple website.

Bluebeam software download | Pc and MacOS
06 months
by sammas.org
in Uncategorized
Are you a construction or design professional looking to optimize your workflow? If so, Bluebeam software might be just what you need. This powerful tool is designed to streamline project management, enhance collaboration, and boost productivity. In this blog post, we’ll walk you through everything you need to know about downloading and using Bluebeam software.
What is Bluebeam Software?
Bluebeam software is a comprehensive suite of tools specifically designed for the architecture, engineering, and construction (AEC) industry. Known for its robust features and user-friendly interface, Bluebeam helps professionals manage their projects more effectively. Key features include advanced markup and annotation tools, efficient document management, and seamless collaboration capabilities.

Why You Need Bluebeam Software
Why is Bluebeam software essential for AEC professionals? Here are a few reasons:
- Enhancing Productivity: Bluebeam’s tools are designed to save you time and effort. For instance, the software’s powerful markup and annotation features allow you to make precise edits quickly.
- Streamlining Workflows: Bluebeam helps you manage your projects from start to finish, ensuring that everyone involved has access to the most up-to-date information.
Where to Download Bluebeam Software
When it comes to downloading Bluebeam software, it’s crucial to choose reliable sources to avoid malware and ensure you’re getting the latest version. Here are the best places to download it:
- Official Website: The safest and most reliable source is the official Bluebeam website. You can find the latest versions and updates here.
- Trusted Third-Party Sites: Websites like CNET and Softonic also offer safe downloads. Just make sure to double-check the site’s credibility.
System Requirements for Bluebeam Software
Before you hit that download button, make sure your system meets the following requirements:
Windows Requirements
- OS: Windows 10 or later
- Processor: Intel Core i5 or equivalent
- RAM: 8GB minimum
- Disk Space: 5GB available space
- Display: 1024×768 resolution
macOS Requirements
- OS: macOS 10.14 or later
- Processor: Intel Core i5 or equivalent
- RAM: 8GB minimum
- Disk Space: 5GB available space
- Display: 1024×768 resolution
Installation Guide
Step-by-Step Installation on Windows
- Download the Installer: Visit the official Bluebeam website and download the Windows installer.
- Run the Installer: Double-click the downloaded file to start the installation process.
- Follow the Prompts: Click “Next” through the installation wizard.
- Finish Installation: Once completed, click “Finish” to exit the wizard.
Step-by-Step Installation on macOS
- Download the Installer: Go to the Bluebeam website and download the macOS installer.
- Open the Installer: Double-click the .dmg file to open the installer.
- Drag to Applications: Drag the Bluebeam software icon into your Applications folder.
- Complete Installation: Open the Applications folder and launch the software.

First-Time Setup and Configuration
After installation, you’ll need to configure your software for the best performance.
Initial Settings
- Select Your Preferences: Choose your preferred settings for language, units, and other general preferences.
- Configure Toolbars: Customize your toolbars to have quick access to the tools you use most often.
User Preferences
- Profiles: Set up profiles to save your preferred settings and configurations.
- Shortcuts: Customize keyboard shortcuts for more efficient navigation and use.
Features of Bluebeam Software
The Bluebeam software comes packed with features designed to optimize your workflow.
Markup and Annotation Tools
- Text and Highlights: Easily add text notes and highlight important sections of your documents.
- Shapes and Lines: Use various shapes and lines to draw attention to specific areas.
Collaboration and Sharing
- Studio Projects: Collaborate with team members in real-time on shared documents.
- Cloud Storage Integration: Seamlessly integrate with cloud storage services like Dropbox and Google Drive.
Document Management
- File Organization: Efficiently organize your files with folders and subfolders.
- Search Functionality: Quickly find documents and specific content within them using advanced search features.

Advanced Features of Bluebeam Software
For those looking to take their productivity to the next level, Bluebeam offers several advanced features.
Quantity Takeoff
- Measurement Tools: Accurately measure lengths, areas, volumes, and more.
- Customizable Settings: Tailor the measurement tools to your specific needs.
Batch Processing
- Batch Slip Sheet: Quickly update multiple documents at once.
- Batch Sign & Seal: Apply signatures and stamps to multiple documents in a single action.
3D PDF Creation
- Model Markup: Add comments and annotations to 3D models.
- View and Navigate: Easily view and navigate 3D models within PDFs.
Troubleshooting Common Issues
Even the best software can run into issues. Here are solutions to some common problems:
Installation Problems
- Check System Requirements: Ensure your system meets the minimum requirements.
- Re-download Installer: Sometimes, a corrupt download can cause installation issues. Try downloading the installer again.
Performance Issues
- Update Software: Ensure you are using the latest version of Bluebeam.
- Optimize Settings: Lowering certain settings can improve performance on older hardware.
Tips for Optimal Use
To get the most out of your Bluebeam software, follow these tips:
Best Practices for Efficiency
- Use Templates: Create and use templates for repetitive tasks to save time.
- Customize Tool Sets: Organize your tools in a way that makes sense for your workflow.
Maintenance Tips
- Regular Updates: Keep your software updated to the latest version.
- Backup Settings: Regularly backup your settings and profiles.

Comparing Bluebeam Software with Competitors
Competitor 1: Adobe Acrobat DC
Adobe Acrobat DC is a powerful PDF editor with a wide range of features. However, it lacks the specialized tools for the AEC industry that Bluebeam offers, such as quantity takeoff and advanced markup capabilities.
Competitor 2: Nitro Pro
Nitro Pro is another robust PDF solution that offers many similar features to Bluebeam. However, its collaboration tools are not as advanced, and it doesn’t offer 3D PDF creation.
Competitor 3: Foxit PhantomPDF
Foxit PhantomPDF is known for its speed and efficiency. While it offers many useful features, it doesn’t provide the same level of integration with AEC workflows and lacks some of Bluebeam’s advanced capabilities.
Unique Features of Bluebeam Software
What truly sets the Bluebeam software apart are its tailored features designed for the AEC industry. Users rave about its intuitive interface and powerful collaboration tools. Testimonials highlight how the software has transformed their workflow, making it easier to manage complex projects and improve productivity.

Frequently Asked Questions (FAQs)
1. Is Bluebeam software free?
No, Bluebeam software is a paid product. However, it offers a free trial so you can test out its features before committing to a purchase.
2. Can I use Bluebeam software on multiple devices?
Yes, Bluebeam allows you to install the software on multiple devices as long as you adhere to the licensing agreement.
3. What if the software doesn’t recognize my documents?
Ensure that your documents are in a compatible format. If issues persist, try updating the software or contacting Bluebeam support.
4. How often should I update the software?
Check for updates regularly, as they can provide new features and fix bugs that improve performance.
5. Can I use the software for live collaboration?
Absolutely! Bluebeam Studio Projects allows for real-time collaboration, making it perfect for team projects.
Conclusion
In conclusion, the Bluebeam software is an essential tool for anyone in the AEC industry looking to enhance their workflow and productivity. With its powerful features and user-friendly interface, Bluebeam makes it easy to manage complex projects and collaborate with team members. Whether you’re marking up documents, managing files, or collaborating in real-time, Bluebeam has you covered. Don’t forget to download it from reliable sources and keep it updated to enjoy the latest features and improvements.
Blue yeti software download | Free Download + Crack
06 months
by sammas.org
in Uncategorized
Blue yeti software download you a proud owner of a Blue Yeti microphone looking to elevate your audio game? You’re in the right place Blue Yeti software can be a game-changer, allowing you to customize and enhance your recording experience. This blog post will guide you through everything you need to know about downloading and using the Blue Yeti software.
What is the Blue Yeti?
The Blue yeti software download is one of the most popular USB microphones on the market, known for its high-quality audio capture and versatile design. Whether you’re a podcaster, streamer, or musician, the Blue Yeti can meet your needs with its four different recording patterns: cardioid, bidirectional, omnidirectional, and stereo. Its user-friendly design and superior sound quality make it a favorite among content creators.

Why You Need Blue Yeti Software
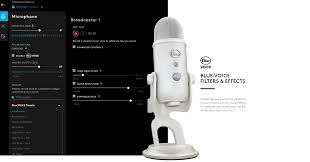
The Blue yeti software download isn’t just a nice add-on; it’s a must-have for anyone serious about audio quality. It allows you to fine-tune your microphone settings, manage audio levels, and apply effects that can significantly enhance your recordings. With this software, you can easily adjust gain, pattern selection, and even add filters to minimize background noise.
Where to Blue yeti software download
When it comes to downloading the Blue Yeti software, it’s crucial to get it from reliable sources to avoid malware and ensure you’re getting the latest version. Here are the top places to download it:
- Official Website: The safest and most reliable source is the official Blue website. You can find the latest versions and updates here.
- Trusted Third-Party Sites: Websites like CNET and Softonic also offer safe downloads. Just make sure to double-check the site’s credibility.
System Requirements for Blue yeti software download
Before you hit that download button, make sure your system meets the following requirements:
- Windows Requirements
- OS: Windows 10 or later
- Processor: Intel Core i3 or equivalent
- RAM: 4GB minimum
- Disk Space: 500MB available space
- USB Port: USB 1.1/2.0
- macOS Requirements
- OS: macOS 10.13 or later
- Processor: Intel Core i3 or equivalent
- RAM: 4GB minimum
- Disk Space: 500MB available space
- USB Port: USB 1.1/2.0
Installation Guide
Step-by-Step Installation on Windows
- Download the Installer: Visit the official Blue website and download the Windows installer.
- Run the Installer: Double-click the downloaded file to start the installation process.
- Follow the Prompts: Click “Next” through the installation wizard.
- Finish Installation: Once completed, click “Finish” to exit the wizard.
Step-by-Step Installation on macOS
- Download the Installer: Go to the Blue website and download the macOS installer.
- Open the Installer: Double-click the .dmg file to open the installer.
- Drag to Applications: Drag the Blue Yeti software icon into your Applications folder.
- Complete Installation: Open the Applications folder and launch the software.
First-Time Setup and Configuration
After installation, you’ll need to configure your software for the best performance.
Initial Settings
Select Your Microphone: Make sure your Blue Yeti is selected as the default input device.
Adjust Gain: Set the gain to a level where your voice is clear without distortion.
Audio Preferences
Sample Rate: Choose a sample rate that matches your recording needs (44.1kHz is standard).
Channels: For most users, mono or stereo will suffice.
Features of Blue Yeti Software
The Blue Yeti software comes packed with features designed to optimize your audio experience.
Noise Reduction
Background Noise Filter: Minimize unwanted background sounds.
Pop Filter: Reduce plosive sounds for cleaner audio.
Voice Modulation
Pitch Shifting: Alter your voice pitch for creative effects.
Reverb: Add depth and space to your recordings.
Recording Options
Multi-Track Recording: Record multiple audio tracks simultaneously.
Live Monitoring: Listen to your recording in real-time.

Troubleshooting Common Issuesn For Blue yeti software download
Even the best software can run into issues. Here are solutions to some common problems:
Software Not Detecting the Microphone
Check Connections: Ensure your USB cable is securely connected.
Restart Software: Close and reopen the Blue Yeti software.
Audio Quality Problems
Update Drivers: Ensure your audio drivers are up-to-date.
Adjust Gain: Lower the gain if your audio is distorted.
Tips for Optimal Use
To get the most out of your Blue Yeti software, follow these tips:
Best Practices for Recording
Use a Pop Filter: This helps in reducing plosive sounds.
Positioning: Keep the microphone at a consistent distance from your mouth.
Maintenance Tips
Regular Updates: Keep your software updated to the latest version.
Clean Your Microphone: Regularly clean the microphone to maintain audio quality.
Comparing Blue Yeti Software with Competitors
Competitor 1: Audacity
Audacity is a free, open-source audio editor. While powerful, it lacks some of the specialized features of Blue Yeti software, such as noise reduction and voice modulation tailored specifically for the Blue Yeti microphone.
Competitor 2: GarageBand
GarageBand is great for macOS users but can be overly complex for beginners. It offers robust editing tools but doesn’t provide the same level of direct integration with Blue Yeti microphones.
Competitor 3: Adobe Audition
Adobe Audition is a professional-grade audio editor with a steep learning curve and high cost. It offers advanced features but may be overkill for casual users who only need basic recording enhancements.
Unique Features of Blue Yeti Software
What truly sets the Blue Yeti software apart are its tailored features designed to enhance the Blue Yeti microphone experience. Users rave about its intuitive interface and powerful noise reduction capabilities. Testimonials highlight how the software has transformed their recording sessions, making it easier to produce professional-quality audio at home.

Frequently Asked Questions (FAQs)
Is the Blue Yeti software free?
Yes, the Blue Yeti software is free to download and use from the official Blue website.
Can I use Blue Yeti software with other microphones?
The software is optimized for Blue Yeti microphones, but it can work with other USB microphones, though some features may not be available.
What if the software doesn’t recognize my microphone?
Ensure that your microphone is properly connected and selected as the input device in your system settings. Restarting the software can also help.
How often should I update the software?
Check for updates regularly, as they can provide new features and fix bugs that improve performance.
Can I use the software for live streaming?
Absolutely The software’s live monitoring feature is perfect for real-time adjustments during live streaming sessions. Read
Conclusion
In conclusion, the Blue Yeti software is an essential tool for anyone looking to enhance their recording capabilities. Whether you’re a seasoned professional or a hobbyist, this software offers a range of features designed to help you get the most out of your Blue Yeti microphone. From easy installation to advanced audio settings, the Blue Yeti software makes it easy to achieve high-quality sound. Don’t forget to download it from reliable sources and keep it updated for the best results.
New Comments